Remote Access to your Office Computer for Windows
Important: Western ROAMs access (Fortinet) is required for Remote Access to your office computer. If you do not have ROAMs access, please see Accessing Western ROAMs.
If you have Windows installed on your office computer, you can use the Remote Desktop feature to allow you to work on that computer remotely. This means, for example, that you can connect to your office computer from home and have access to all of your applications, files, printers, and network resources as though you were in your office.
Step 1: Setup the Office and Local Computers
Setting up your Office Computer
Your office computer must be left turned on whenever you need remote access to it. It is up to you whether you wish to leave yourself logged in or not.
To setup your office computer for remote access, enable the Remote Desktop feature. You must be a Local Administrator on your computer. If you are not a Local Administrator, you will see a message when you attempt the following steps asking you to contact your Administrator. Please contact SSTS or your department IT support person.
Windows 11
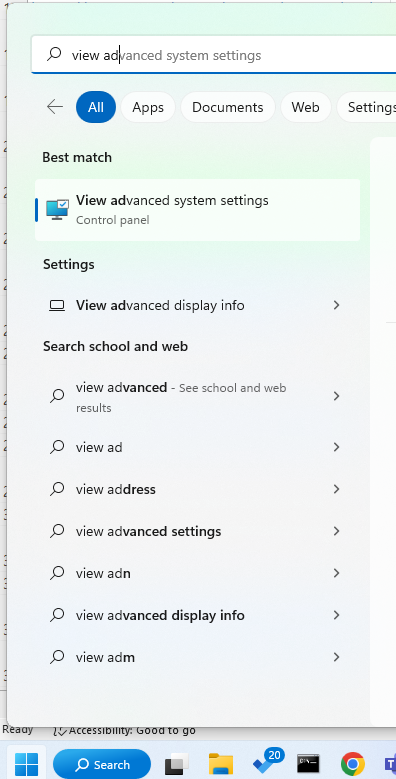
- Click on the start button and type view advanced system settings in the top search bar.
- Advanced system settings from the list of search results.
- The System Properties windows will appear. Select the Computer Name tab along the top row.
- Record the Full computer name as it is shown in this window; you will need this when you launch the remote desktop session described below.

- Then choose the Remote tab near the top right of the window.
- Check the option for Allow remote connections to this computers.
- Note that Allow Remote Assistance connections to this computer will likely be checked by default. We recommend that you un-check it for security reasons.
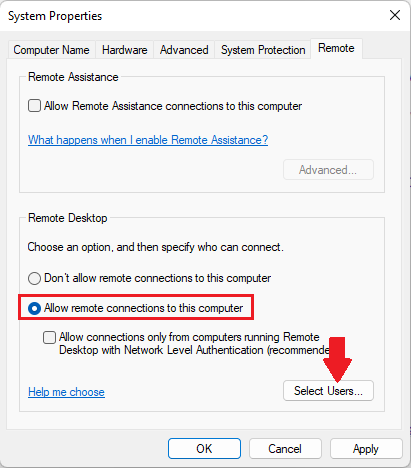
- Next, click the Select Users... button.
- Click Add to insert the usernames of additional people who you wish to grant remote access to. The username must be entered as: UWO\username (e.g., UWO\jsmith will allow the user jsmith to remotely access your office computer). Users who are administrators on the office computer (i.e., your own username) do not need to be added since these are automatically given remote access. Only administrators and users added here will have remote access to your computer and only one user can be logged on at a time.
Locking Your Office Computer
You can log off from your office computer before leaving for home, or simply stay logged in to your current Windows session to resume work later and leave applications or files you are working on open. If you leave files open, it is best to save them before leaving and lock your computer.
How do I lock my computer?
It is advisable that you enable a screen saver with a password. This will cause your computer to be automatically locked after the specified period of time to prevent someone else, who has access to your office, from using your logged in account. Alternatively, you can force your computer to be locked by simply pressing Ctrl-Alt-Delete and clicking on the Lock Computer button.
Note: As a power saving measure, you may power off your monitor when leaving since it is not required for remote access but your computer must be powered on.
Setting up your Local Computer
In order to access computing resources at Western from off-campus, you are required to login to Western ROAMs using Fortinet at remote.uwo.ca. These instructions assume that you have already applied for and been granted Western ROAMs access, and that you have installed and configured Fortinet.
Note: You should have Fortinet connected to setup your Remote Desktop Connection.
- Click the Start icon to open the Start Menu.
- Type Remote Desktop Connection to search for the application which should appear at the top.
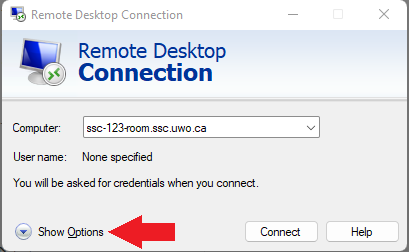
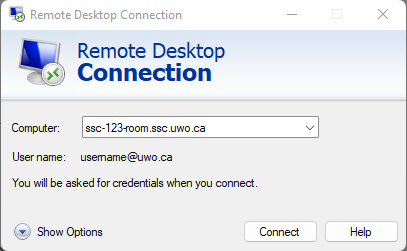
- Select the application and the Remote Desktop Connection window will open.
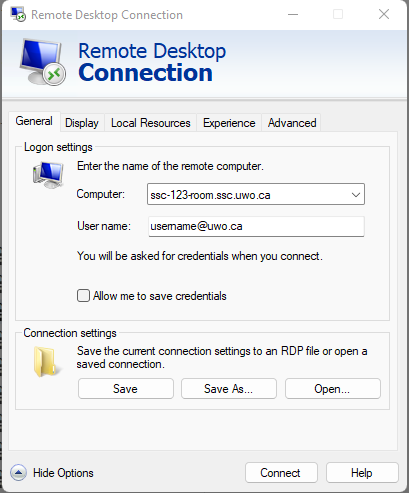
- Enter the Computer name that you recorded in the step for Setting up your Office Computer or that you were provided. Sometimes people find that the IP address works better here.
- Click the Show Options arrow on the Remote Desktop Connection.
- Under the General tab, beside User name: enter your Western username as username@uwo.ca.
- We recommend that you do not save your credentials.
- Under Display, we recommend that you drag the slider all the way to the right to use the full screen. If you have dual monitors, check the box for Use all my monitors for the remote session.
- Under Local Resources, we recommend that you check Printers and Clipboard. If you click the More... button, you can choose to connect your local drive.
- If you have a slow connection, connecting Local Resources may deteriorate your remote experience. You might consider only connecting your local drive when you need it.
- Under General click the Save button and save the RDP file to the Desktop. Call it either OfficePC or your computer name. This shortcut can be used to easily launch Remote Desktop to your office computer.
Step 2: Work on Your Office Computer Remotely
Now that you have everything set up, you should be ready to run a Remote Desktop session to your office computer. Note that if you are running Remote Desktop and you are already on campus, you do not need to run Fortinet so you can skip the first and last steps below.
Connect to Fortinet
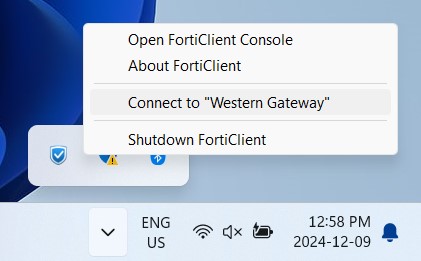
You will find Fortinet in the System Tray on your computer. If the icon is not visible, click on the up arrow.
Right-click on the Fortinet icon ![]() , and click Connect to "Western Gateway".
, and click Connect to "Western Gateway".
Connect to Your Office Computer
Run Remote Desktop and connect to your office computer as follows:
- Double-click the desktop shortcut if you created one above, OR
- Click the Start icon to open the Start Menu.
- Type Remote Desktop Connection to search for the application which should appear at the top.
- Select the application and the Remote Desktop Connection window will open.
- You should see the connection you setup for your computer name earlier. Select it and choose Connect.
Then, login and work as if you were in your office—you will experience the same interaction with your office computer as you would sitting in your office.
Working in the Remote Session
When you are working in the Remote session it's just like you are working on the computer in your office.
Switching between computers
You can switch back to your local computer by moving your mouse to the top of the Remote Desktop Connection window and clicking on the minimize (-) button. To return to the remote session, click on the Remote Desktop Connection icon in your Task bar.
Printing
You can choose to print to a printer on your office computer, or print to a local printer if you set that up. When printing, be careful to choose your intended printer.
Copy and Paste
The copy (Ctrl-C) and paste (Ctrl-V) feature can be used to move files, blocks of text and images from the Remote Computer to your Local Computer or vice versa.
Closing the Remote Session
When you are finished working you can either log off from your office computer, or disconnect.
- To log off, click the Start icon, click the head and shoulders logo, and then click Sign out.
- To Disconnect, simply click the X at the top of the Remote Desktop Connection window. This will leave you logged on and your programs running.
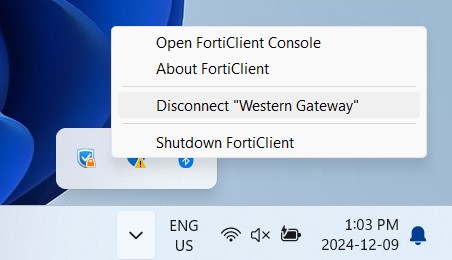
Disconnect from Fortinet
You will find Fortinet in the System Tray on your computer. If the icon is not visible, click on the up arrow.
Right-click on the Fortinet,![]() and click Disconnect "Western Gateway".
and click Disconnect "Western Gateway".